

September 23rd, 20083 mins read
Quick tip to get a striped background
If you are looking to apply a striped background to any of your elements, you don’t need to rely on a PNG tile. Instead you can do it all in Xaml, using a LinearGradientBrush.
Suppose you want to color a large Rectangle with a 45 degree striped background, something like:
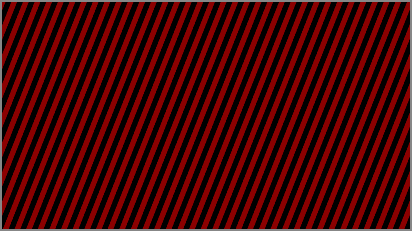
You can do this with a LinearGradientBrush, like so:
<LinearGradientBrush StartPoint="0,0" EndPoint="1,1" SpreadMethod="Repeat">
    <GradientStop Offset="0" Color="DarkRed"/>
    <GradientStop Offset="0.5" Color="DarkRed"/>
    <GradientStop Offset="0.5" Color="Black"/>
    <GradientStop Offset="1" Color="Black"/>

    <LinearGradientBrush.RelativeTransform>
        <ScaleTransform ScaleX="0.01" ScaleY="0.01"/>
    </LinearGradientBrush.RelativeTransform>
</LinearGradientBrush>
The interesting things to note are:
- The two GradientStops at 0.5 give you the split in colors. If you want more, say a three-color split, add the GradientStops at 0.33 and 0.66
- The SpreadMethod of Repeat, gives you the repeating pattern
- A RelativeTransform on the gradient allows you to tweak the width and orientation of the stripes. Here we are only controlling the width. You can add a RotateTransform to orient your stripes.
Few more examples
Here are a few more examples just to get you more creative…
Three way colors
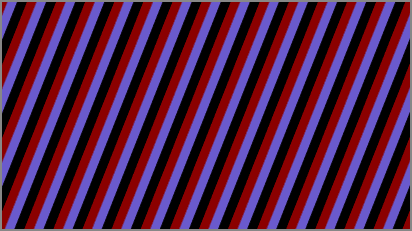
<LinearGradientBrush StartPoint="0,0" EndPoint="1,1" SpreadMethod="Repeat">
    <GradientStop Offset="0" Color="DarkRed"/>
    <GradientStop Offset="0.33" Color="DarkRed"/>
    <GradientStop Offset="0.33" Color="SlateBlue"/>
    <GradientStop Offset="0.66" Color="SlateBlue"/>
    <GradientStop Offset="0.66" Color="Black"/>
    <GradientStop Offset="1" Color="Black"/>

    <LinearGradientBrush.RelativeTransform>
        <ScaleTransform ScaleX="0.025" ScaleY="0.025"/>
    </LinearGradientBrush.RelativeTransform>
</LinearGradientBrush>
Four way colors
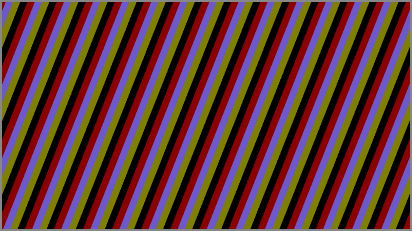
<LinearGradientBrush StartPoint="0,0" EndPoint="1,1" SpreadMethod="Repeat">
    <GradientStop Offset="0" Color="DarkRed"/>
    <GradientStop Offset="0.25" Color="DarkRed"/>
    <GradientStop Offset="0.25" Color="SlateBlue"/>
    <GradientStop Offset="0.5" Color="SlateBlue"/>
    <GradientStop Offset="0.5" Color="Olive"/>
    <GradientStop Offset="0.75" Color="Olive"/>
    <GradientStop Offset="0.75" Color="Black"/>
    <GradientStop Offset="1" Color="Black"/>

    <LinearGradientBrush.RelativeTransform>
        <ScaleTransform ScaleX="0.025" ScaleY="0.025"/>
    </LinearGradientBrush.RelativeTransform>
</LinearGradientBrush>
Thicker stripes
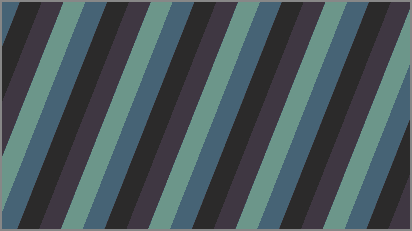
<LinearGradientBrush StartPoint="0,0" EndPoint="1,1" SpreadMethod="Repeat">
    <GradientStop Offset="0" Color="#466375"/>
    <GradientStop Offset="0.25" Color="#466375"/>
    <GradientStop Offset="0.25" Color="#2b2a2a"/>
    <GradientStop Offset="0.5" Color="#2b2a2a"/>
    <GradientStop Offset="0.5" Color="#3f3742"/>
    <GradientStop Offset="0.75" Color="#3f3742"/>
    <GradientStop Offset="0.75" Color="#6c968a"/>
    <GradientStop Offset="1" Color="#6c968a"/>

    <LinearGradientBrush.RelativeTransform>
        <ScaleTransform ScaleX="0.075" ScaleY="0.075"/>
    </LinearGradientBrush.RelativeTransform>
</LinearGradientBrush>
With all this knowledge, who doesn’t want to paint the town ;-)