

A tip for referencing Assets in your WPF application
Organizing and referencing assets (images, fonts, xaml) has always been an interesting topic of discussion. There is still no proper guidance and is wide open for experimentation.
Organizing assets
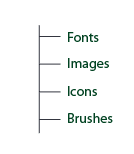
If you have few assets, you could just keep them under a folder in your main assembly. However if you have a variety of assets and in large numbers, you are better off keeping them in separate assemblies. Each assembly can now serve as a theme for your application. Within the assembly you could break up your assets into a folder structure. As a simple example, you could have a structure like so:
You can come up with a more elaborate structure depending on the variety and the number of assets that you have. Since this post is more about referencing assets than organizing them, I am going to jump to that now. I assume you already have a folder structure for your assets that is similar to the one I mentioned above.
Referencing assets
If you are to store your assets in a separate assembly, the referencing Uri can be rather long, something like:
pack://application:,,,/Company.ThemeName;componentup.png
Try typing few of those Uri’s and I can guarantee the beginnings of a Carpal tunnel ;-). This is where a MarkupExtension can be very useful. It will abstract out those long paths and only keep the part that is essential. So you could be seeing something like:
<ImageBrush x:Key="SelfFill"
            ImageSource="{ln:Asset Icons/marker/self_fill.png}" />
Surely this is more readable than the previous path. If you are a bit
more adventurous, you can also add a prefix to the path that will
further abstract the actual location of the resource. For example the
above MarkupExtension usage could be: {ln:Asset MarkerIcons:self_fill.png}. Note the MarkerIcons: prefix, which will
internally map to the Images/Icons/marker path. You can come up with
your own prefixes that will simplify the paths, as you see fit for your
project.
The AssetExtension class contains the logic to parse the paths and create the appropriate resources. Just like every other MarkupExtension, the ProvideValue() method is where the bulk of the logic is. In the case of AssetExtension, there is a Regex that parses the path and identifies the kind of resource we are dealing with.
Here is the Regex that I am using:
private static Regex ResourceRegex = new Regex(
        @"
                (?<Image>(.png|.jpg|.bmp)$)
                | (?<Font>#.+$)
                | (?<Xaml>.xaml$)
        ",
        RegexOptions.Singleline | RegexOptions.Compiled |
RegexOptions.IgnorePatternWhitespace |
        RegexOptions.IgnoreCase | RegexOptions.CultureInvariant);
Once we know the resource-type, we create it inside of ProvideValue() and return that as the output. The core methods are below. ResourceType is an enum that I am using internally.
public static Uri GetResourceUri(string path)
{
    string asmName = Assembly.GetExecutingAssembly().GetName().Name;
    string uriString =
     string.Format("pack://application:,,,/{0};component/{1}",
                           asmName, path);
    Uri uri = new Uri(uriString);

    return uri;
}

public override object ProvideValue(IServiceProvider serviceProvider)
{
    IProvideValueTarget ipvt =
    serviceProvider.GetService(typeof (IProvideValueTarget))
                                           as IProvideValueTarget;
    if (ipvt == null) return null;

    ResourceType type = ParseResourceType(Path);
    switch (type)
    {
        case ResourceType.Image:
            BitmapImage image =
                        new BitmapImage(GetResourceUri(Path));
            return image;

        case ResourceType.Font:
            FontFamily family =
                       new FontFamily(GetResourceUri(""), Path);
            return family;

        case ResourceType.Xaml:
            return GetResourceUri(Path);
    }

    return null;
}

private ResourceType ParseResourceType(string path)
{
    ResourceType type = ResourceType.None;

    Match match = ResourceRegex.Match(path);
    if (match.Groups["Image"].Success) type = ResourceType.Image;
    else if (match.Groups["Font"].Success) type = ResourceType.Font;
    else if (match.Groups["Xaml"].Success) type = ResourceType.Xaml;

    return type;
}
Summary
So if you have project that uses a ton of assets, it is probably easier to use a MarkupExtension to reference them instead of hard-coding paths. Besides simplifying the paths, it also helps you in refactoring. If you wish to relocate the assets to a different assembly or change the folder structure, it is much easier now, since you only change the AssetExtension.
The attached source file contains all the code. Note that it does not contain the code for parsing prefixes. I’ll leave that as an exercise for the readers!
